Installation#
Topiary is a python package that wraps several external software packages. This walks through installing topiary and all of the external software packages it wraps.
Important
Topiary requires a linux or macOS machine. Windows is no longer supported.
Basic Installation#
The easiest way to install topiary and its dependencies is to use the provided installation script.
Download and install miniconda
Open a terminal and run the following commands:
conda install git
git clone https://github.com/harmslab/topiary
cd topiary
bash install.sh
The install.sh script will:
Prompt you for a conda environment name (default is topiary).
Ask for an optional NCBI API Key. Providing one is highly recommended to avoid rate-limiting during BLAST searches.
Prompt you about cluster installation (see below).
Create the conda environment, install all python dependencies, and compile the necessary external binaries (RAxML-NG and GeneRax).
Cluster Installation#
If you are installing topiary on a high-performance computing cluster, you generally need to ensure that the external software (GeneRax) is compiled using the cluster’s specific MPI and C compilers.
To do this:
Identify the correct MPI and compiler modules on your cluster (e.g., using module spider mpi). The details of this step depend on your cluster architecture. If you do not know how to do this, please contact your cluster administrator.
Open dependencies/compile-generax.sh in a text editor.
Add the appropriate module load command near the top of the script. For example:
module load mpi/gcc/13.1.0/openmpi/4.1.6
Save the file and run bash install.sh. When prompted if you are on a cluster, answer y.
This ensures that GeneRax and RAxML-NG are linked against the cluster’s high-performance interconnects, allowing them to run efficiently across multiple nodes.
Checking Installation#
After the installation script finishes, you can verify that everything is installed correctly by running:
conda activate topiary
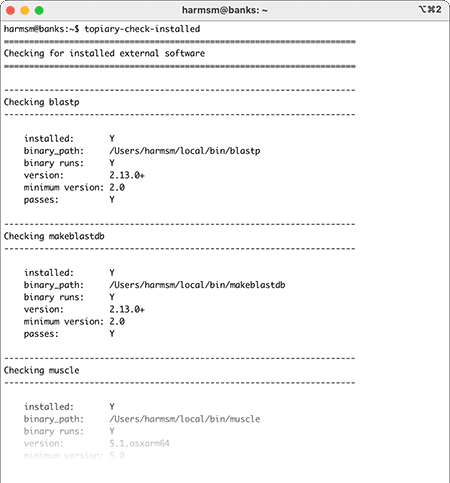
topiary-check-installed
(Replace topiary with your custom environment name if you chose one).
The output should show passes: Y for all required packages:
NCBI API Key#
If you did not provide an NCBI API key during the initial installation, you can add one later by running:
conda env config vars set NCBI_API_KEY='your_key_here' -n topiary
This ensures the key is automatically exported whenever the topiary environment is activated.
Required Software#
While install.sh handles these automatically, topiary relies on the following software. Note that we use custom versions of these (specifically GeneRax and RAxML-NG), so we cannot gaurantee topiary will function using other versions of these pieces of code. Our custom versions are included in the dependencies directory.
Tree manipulation/drawing:
Packages used for tree/ancestor inferences: